Difference between revisions of "Installing linux"
From Gender and Tech Resources
m |
m (Alex moved page Installing linux to Linux - Installing without leaving a redirect) |
(No difference)
| |
Revision as of 08:31, 11 September 2015
M$ wants to keep you locked in to Windows so that it can take your money, your personal data, and your user freedom. They don’t want you to know that you have a choice of better operating systems; operating systems that respect your freedom. There are tons of free "as in freedom" software operating systems that you can download and install at no cost.
And when they’re improved, you can choose whether or not you want to upgrade, without a corporation breathing down your neck. It is time to upgrade your computer, but not to Windows 8.
Contents
- 1 Shopping for a linux distro
- 2 You can have both
- 3 First things first
- 4 Choose your kernel and download iso(s)
- 5 Verify downloads
- 6 Make a bootable medium
- 7 Boot box from bootable medium
- 8 Dual boot with windows
- 9 Manual partitioning
- 10 F*&^% bootloader and rescue mode
- 11 Upgrading distributions
- 12 Getting a device to work
- 13 Installing debian like an expert
- 14 Stealth install
- 15 Related
- 16 References
Shopping for a linux distro
There are many distributions. Ubuntu and mint are considered the easiest for new users who want to get productive in linux as soon as possible without having to master all of its complexities immediately. And more consideration(s) may apply.
Myths?
Linux is hard to install
Non-sense. New users can get started pretty quickly with USB or CD/DVD systems that allow for trying out a particular linux first. Installing linux is pretty easy these days, but getting everything to work exactly the way you like it can take a little more work.
The install itself is nothing more than a download, making an install medium, some mouse clicks and deciding of basic options like timezone, language, user name, passwords. Even though all are of laughable simplicity in their use, each Linux installation has its own setup utility, different from all the others, or nearly the same like in the case of mint and ubuntu.
This page contains installation guides for mint, ubuntu and debian for you to make informed decisions with. This is as good and as bad as it gets.
Linux does not recognize my hardware
This can happen if your machine is younger than 6 months. Reason?
In M$ worlds, firmware is usually a part of the driver you install, not seen by the user. In linux, firmware may be distributed from a number of sources. Some firmware comes from the Linux kernel sources. Others that have redistribution licenses come from upstream. Some firmware unfortunately does not have licenses allowing free redistribution. See getting a device to work.
Linux is too complicated to use
Ehh. Myth. It has a graphical interface with a mouse and windows. It has an auto-updater to keep things current. It has software add/remove capabilities that allow you to install programs with a couple of mouse clicks. It even has many apps found in windows and mac OS X like firefox, thunderbird, pidgin, audacity, …
There are no applications available
Non-sense. If you do not have a "stripped linux", after install you have all you need for usual use (if you pick the right distro for you) and if it isn't there already, thousands of additional applications available for free: Nearly every distro has a centralized location where you can search for, add, or remove software (using a point and click interface or the command line). With package management systems, you can open up one tool, search for an application (or group of applications), and install without having to do any web searching (or purchasing).
It is true that windows used to be the better platform for games, but recently Steam has arrived in linux. And some windows games can be run on linux using wine (but not all). The game you wish to play may actually be available for linux now.
Reasons for using linux as an activist
Security
I don’t think any operating system is ever "secure". A particular configuration of an operating system has a particular degree of resistance to particular types of attacks. Linux and M$ products are not easy to compare but some general statements are regularly made:
- Windows is more difficult to "strip down" than Linux systems.
- Viruses are less of a threat on linux. This also applies to spyware, malware, etc.
And some theories posed:
- Theory 1: Because linux is not owned by a corporation, it can explore the security goal more fully than a corporation can. Businesses must make money; while free software groups simply don’t have this restriction. Facts and Fallacies of Software Engineering (2003) [1] and When Free Software Isn’t Better (2010) [2] kindly dispelled this theory.
- Theory 2: Because the linux kernel code, and many of its drivers and utilities are free, it has likely been reviewed and fixed frequently for coding mistakes that can lead to remote vulnerabilities that a hacker can exploit. This then prevents backdoors.
The shellshock vulnerability will still be found in unpatched systems for the foreseeable future—though the odds of it directly impacting our local machines appear slim if using standard security precautions. If scary or seemingly too complex get a local geek to help you with that or hit the respective forums.
We are well into the 21st century, but it is astonishing how people can still believe that Linux-based operating systems are completely secure. Indeed, "Linux" and "security" are two words that you rarely see together.[3]
Update ability
Linux is in a constant state of development and improvement by developers donating their time and skills to the various projects in return for their own enjoyment and learning. The licensing allows anyone to add features they need. The usual route for that is: Request feature; not satisfied (takes too long or is rejected?); Fork and go [4].
Support
Support for linux and linux applications is amazing. You can have an issue with something, check the documentation and the forums, and if nothing found, send out an e-mail to a mailing list or post on a forum, and within 10 minutes be flooded with suggestions. Or it can take hours or days. Or may never come. Still, generally speaking, most problems with Linux have been encountered and are documented. Chances are you’ll find solutions fairly quickly.
Self-improvement
With Linux you have a room where floor and ceiling can be raised or lowered as high or low as you want them. With Windows, neither move. You can’t go further than M$ has deemed it necessary for you to go. If not satisfied with going through life with blinders on and living the technical "M$ status-quo", linux is an excellent choice. Linux provides an environment for learning new skills and gaining deeper insights into how computers work. It also provides a platform to develop more scripts and tools. It’s ways and communities tick most "autonomy" aspects.
Low cost
The cost advantage of linux is huge, especially in resource constrained environments. You get the complete OS, thousands of applications AND support for the grand total price of … <drumroll> … zilch! And we’re not talking about the crumbs that fell off a (big) business plate, not a watered down whiskey, not a feature deprived OS … ye get a full-blown, complete, freakishly configurable and flexible intuitive ready OS, for free. And it runs on old computers.
Linux expands the life of your hardware by reducing overhead and needing less system resources, which is why it runs fine on older machines. And you can do the tests yourself of course. [5][6]
You can have both
You can have both windows and linux on your machine, each installed on a separate disk or partition, and choose which to start when booting. This configuration is called "dual boot", and the debian installation system can set it up during the hard drive partitioning stage of installation and setting up the bootloader. Follow the standard install, but do partitioning first as described in dual boot.
First things first
The linux installation (.iso) file(s) can be copied directly onto a USB or "burned" in a way that expands/extracts the image so it contains by the target machine usable files CD/DVD. The new major distro's seem to all use isohybrids.
Goodbye microsoft
Debian offers a windows program that will download and set up a 32 bit debian installer. You then only need to reboot the computer and choose between normal windows boot or booting the installation program. You can find it here http://ftp.debian.org/debian/tools/win32-loader/stable/ and here http://goodbye-microsoft.com/.
It doesn't have to be a definitive goodbye. You can still leave the M$ door open. The installer will still allow you to choose a so-called dual boot.
For installation via USB you need ...
To install via USB you need a USB stick and a bios on the target machine that allows you to boot from that USB stick, and a way to put the iso on the USB stick.
A BIOS on the target machine that allows you to boot from USB
Some older PHOENIX BIOS simply do not have an entry for that. In such a case move over to another type of medium for install like CD/DVD.
A USB stick
Minimal size 8G (or smaller if you are doing a net-install).
cp and sync
For some distributions you can use unetbootin. On linux you can install unetbootin from the repositories, on windows you can download it from http://unetbootin.sourceforge.net/ The current stable debian named jessie is not installable via unetbootin https://bugs.debian.org/cgi-bin/bugreport.cgi?bug=775689
And with the iso-hybrid images, it is no longer a necessity to use unetbootin. You can copy and sync isohybrids: https://www.debian.org/releases/stable/amd64/ch04s03.html.en#usb-copy-isohybrid.
For installation via a CD/DVD you need ...
To install from a CD/DVD, you need a working RW drive, CD/DVD burner software and a blank CD/DVD for your recorder.
A working Read/Write drive
Check the CD/DVD drives on the front or inside the machine and look up the labels on the internet to see if it can record. On linux you can use:
$ dmesg | egrep -i --color 'cdrom|dvd|cd/rw|writer'
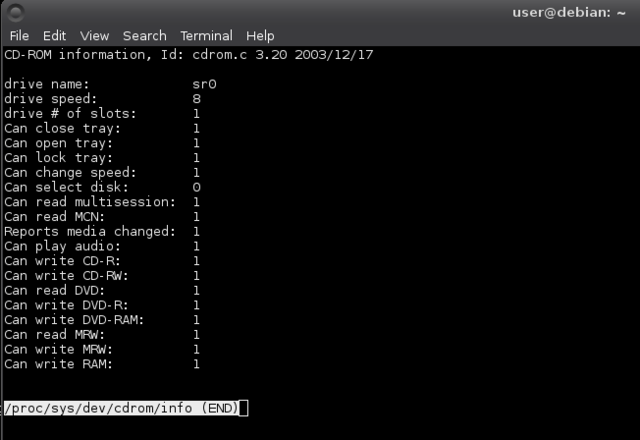
In this output sr0 is my CD/DVD reader and writer. You can see more detailed information with:
$ less /proc/sys/dev/cdrom/info
DVD burner software
On linux you can use brasero. If you are using the GNOME desktop, brasero is installed by default. The menu entry is in Applications > Sound & Video. If not there, you will have to install the application:
- Open up your package manager (synaptic, gnome-packagekit, software center). This example continues with synaptic:
- Search for "brasero"
- Mark the brasero entry for installation
- Click Apply (or Install) to start the installation.
A blank CD/DVD
DVD+R and DVD-R are different and competing standards for recording on DVDs. The DVD+RW alliance is headed by sony, yamaha, philips, dell, and microsoft, and the DVD Forum by apple, pioneer, mitsubishi, hitachi, and time warner.
The difference between DVD-R and DVD+R is not important for DVD players because virtually all players play both formats; the difference is important in DVD recorders.
The main difference between DVD R and DVD RW (whether plussed or dashed) is that the R is a write-once format. Data can be burned on the DVD only once. On the other hand, data on an RW disc can be erased and rewritten several times.
Choose your kernel and download iso(s)
Download mint, ubuntu or debian for your preferred medium from http://www.linuxmint.com/download.php, http://www.ubuntu.com/download or https://www.debian.org/releases/jessie/debian-installer/. Oh dear, which one?
If you are confused about whether your kernel is 32 or 64 bits, in linux do:
$ uname -m
x86_64 means a 64-bit kernel and i686 means a 32-bit kernel. In windows try this https://support.microsoft.com/en-us/kb/827218
Note: you can install a 32-bit kernel on a 64-bit CPU. The fundamental difference between 32 and 64 bit systems is the size of memory addresses. In theory, a 32 bit system can not work with more than 4 GB of RAM (232 bytes). In practice, it is possible to work around this by using the 686-pae kernel, so long as the processor handles the PAE (Physical Address Extension). There is a performance price to pay for this, so if you are installing on a server with a huge amount of RAM, use the 64 bit kernel.
To learn more about your CPU in linux do:
$ cat /proc/cpuinfo
For windows you can type dxdiag in the run box.
Verify downloads
Verify all dowloaded iso's. You can verify for example, the md5 or sha256 checksum of the first downloaded debian .iso file in linux with:
$ md5sum debian-8.1.0-amd64-DVD-1.iso
respectively:
$ sha256sum debian-8.1.0-amd64-DVD-1.iso
and compare the output with key listed for debian-8.1.0-amd64-DVD-1.iso in respectively http://cdimage.debian.org/debian-cd/8.1.0/amd64/iso-dvd/MD5SUMS and http://cdimage.debian.org/debian-cd/8.1.0/amd64/iso-dvd/SHA256SUMS Other checksums are also given.
Windows does not come with md5sum. There are command line utilities (md5sum.exe) and the version available from Cygwin is probably easiest to install and update. Once installed, Cygwin's md5sum behaves exactly as the md5sum described for linux above.
Make a bootable medium
Burn CD/DVD
On windows right click on the iso and choose "burn". Then follow whatever follows on M$ for burning iso's.
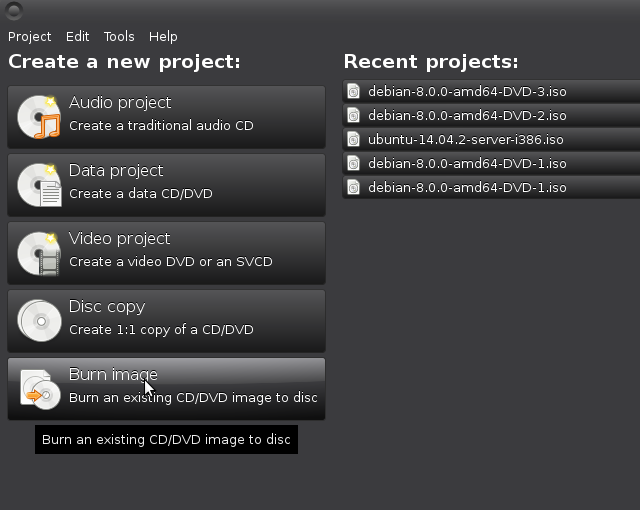
On linux, start brasero (or other tool you prefer):
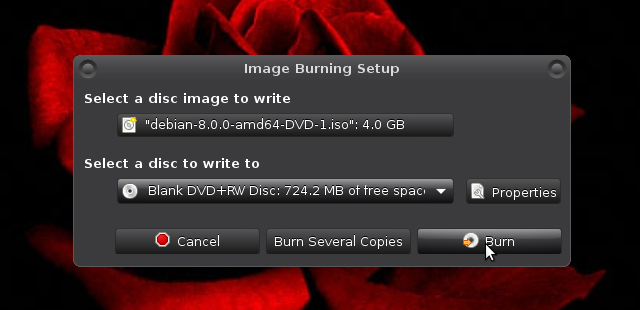
Select the iso and burn, baby, burn:
Make an image on USB
Isohybrids are making that easy! For example:
$ sudo cp debian-8.1.0-amd64-DVD-1.iso /dev/sdb
$ sudo sync
Boot box from bootable medium
Boot from the USB, CD- or DVD-ROM:
- Put boot medium with installer in slot and restart machine.
- At boot, enter the BIOS by pressing F2. Some machines use other keys http://pcsupport.about.com/od/fixtheproblem/ht/accessbios.htm and if you have a Windows 8.1 tablet or device with a UEFI BIOS, then booting to the BIOS no longer works the way it did on classic desktop PCs http://www.makeuseof.com/tag/how-to-access-the-bios-on-a-windows-8-computer/ and once you are in, you have to shut off Secure Boot and Fast Boot (and Quick Boot) in the UEFI or turn UEFI off completely in favour of "Legacy BIOS". If your EFI based PC is not booting debian, here is an easy way to reinstall grub-efi, the bootloader used by debian on these PCs: https://wiki.debian.org/GrubEFIReinstall#Reinstalling_grub-efi_on_your_hard_drive
- Set the BIOS to boot from your installation medium, save, and exit.
Booting will continue and if all went well, your first installer screen appears.
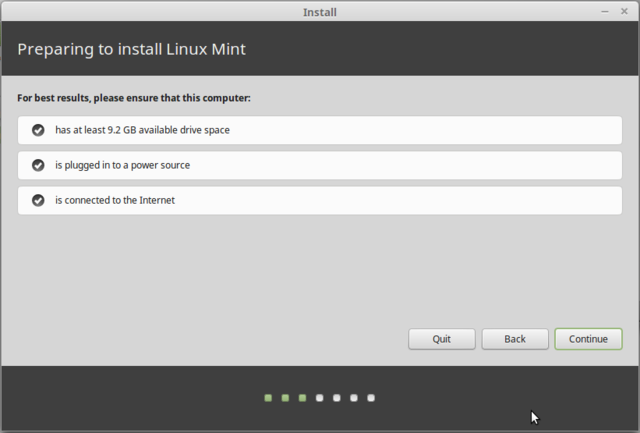
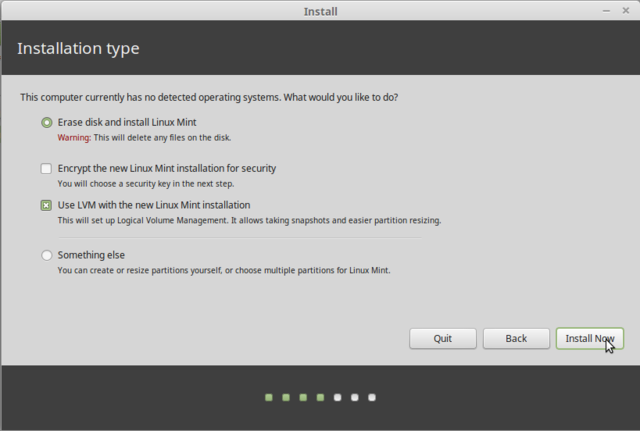
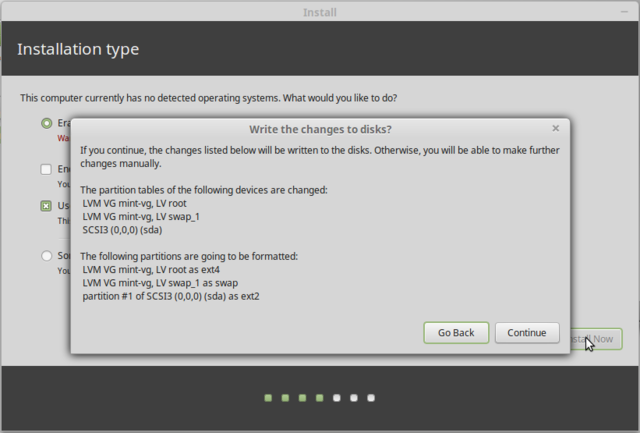
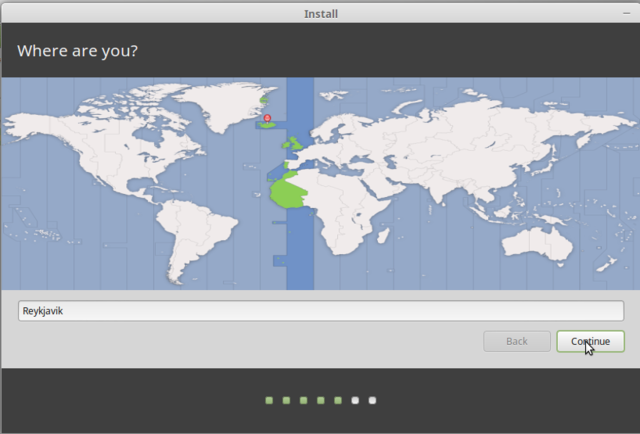
Mint with CINNAMON
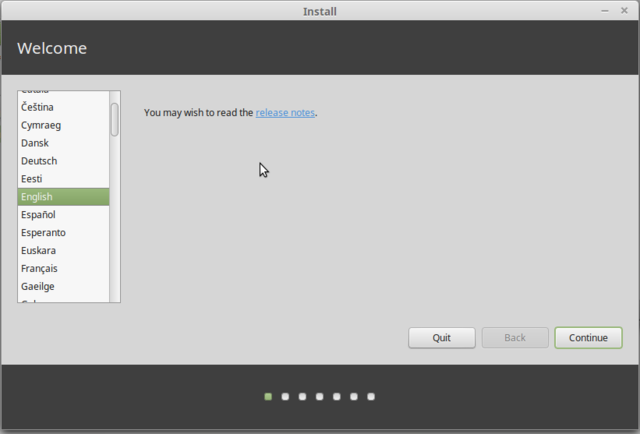
Mint starts up in Live CD. Have a look around. Going for it? Click the Install Linux Mint CD icon:
After install
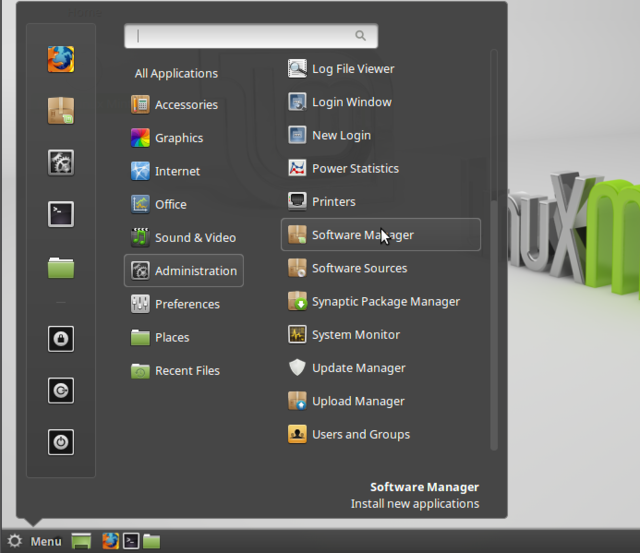
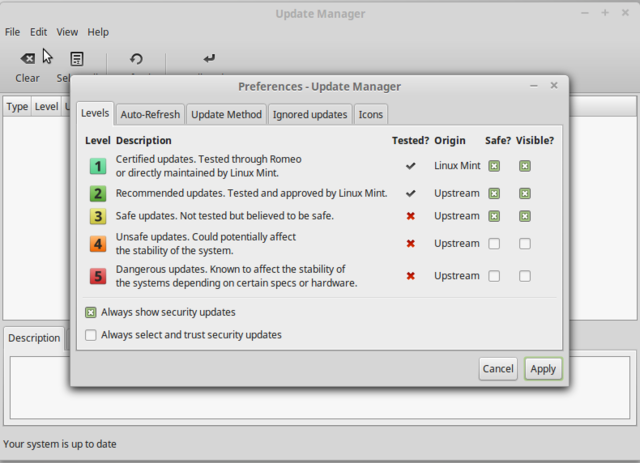
Do NOT apt-get update and upgrade on the command-line for the updates. Go to the updater in the menu (4 locations down from the software manager). Use the menu.
Ubuntu with GNOME
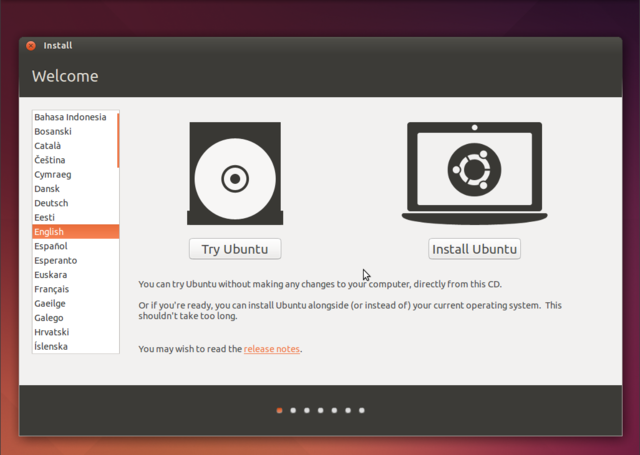
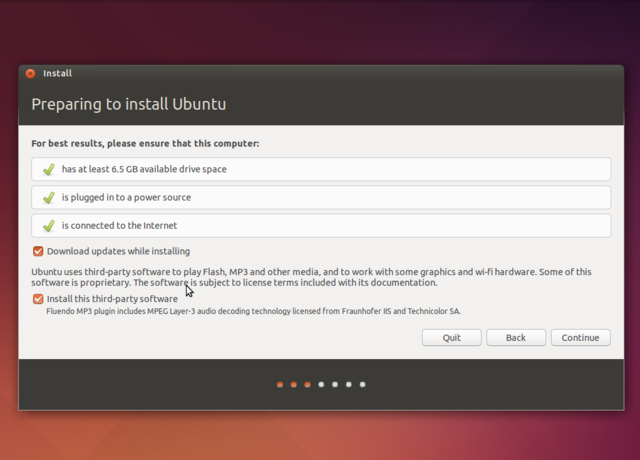
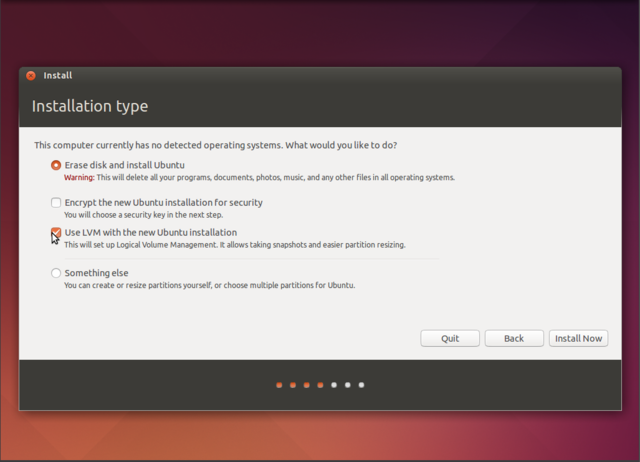
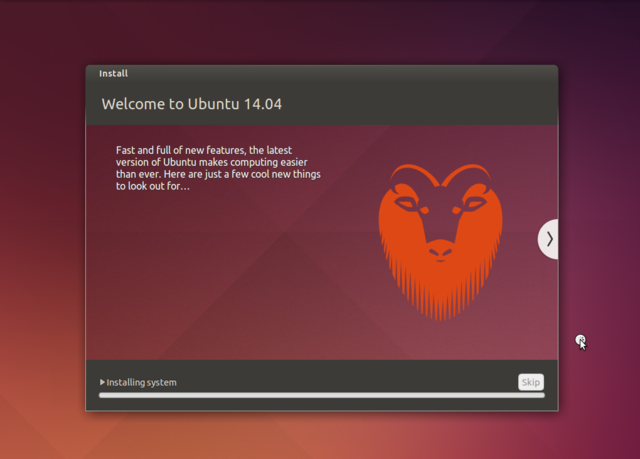
Click install Ubuntu, then do the preparations. If you play a musician role you will probably want the Fluendo codecs installed, for that tick the "Install this third-party software" box.
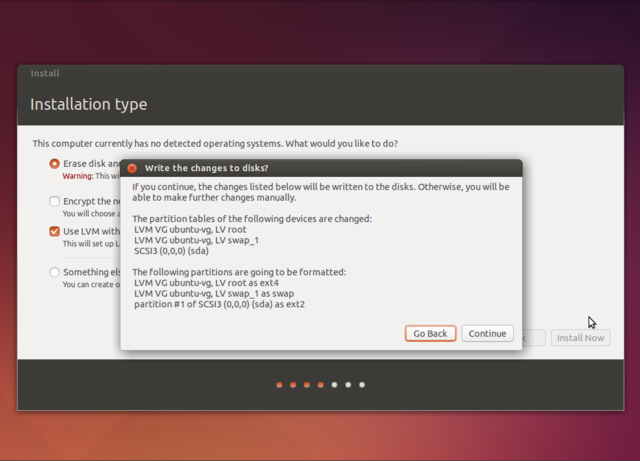
LVM will allow you to later resize partitions. If it's a laptop you are installing on and you regularly take it into public spaces, encrypt the Ubuntu installation.
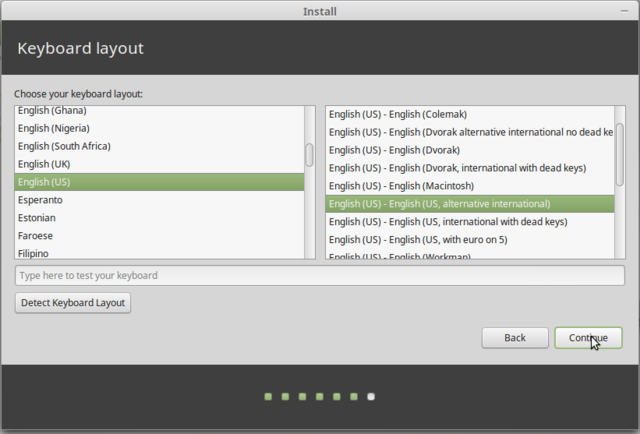
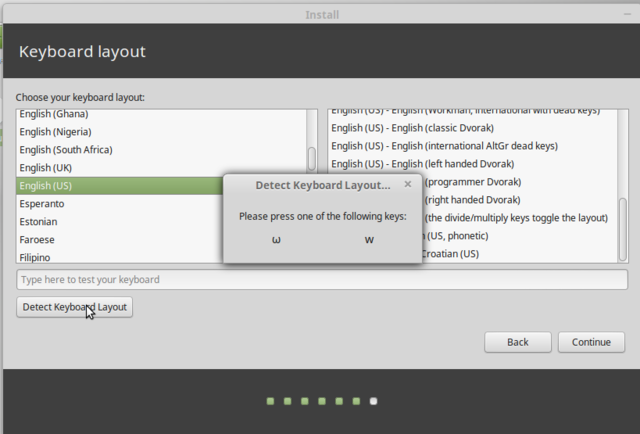
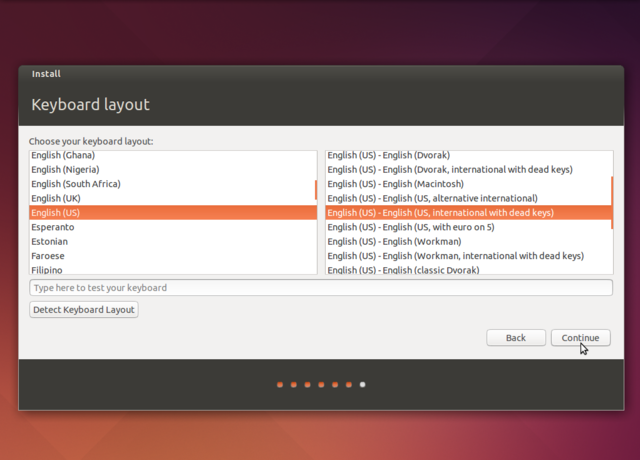
Pick your keyboard, or if you feel uncertain have the installer detect it for you.
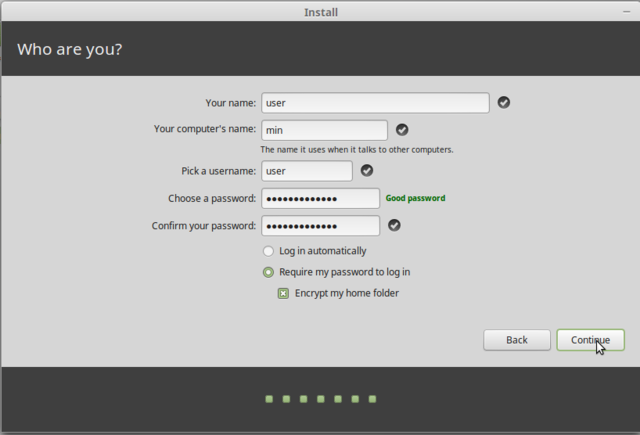
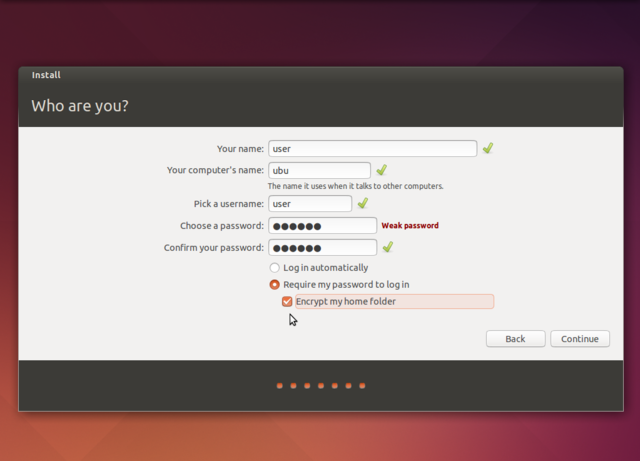
Make that minimally six. The "after install" things I do require me to enter my password and I am lazy so I initially make it a small one and make it a better one later.
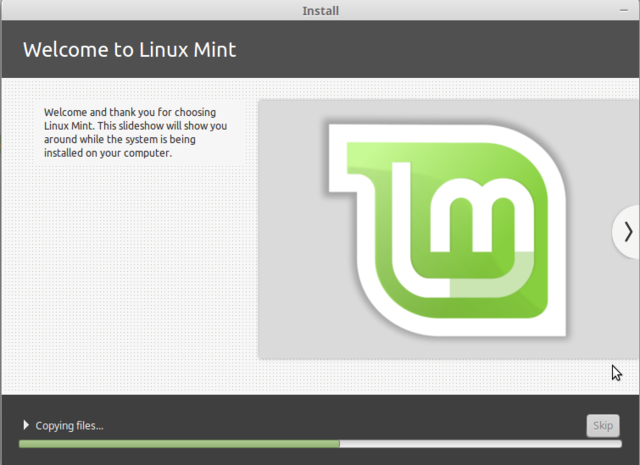
Installation ...
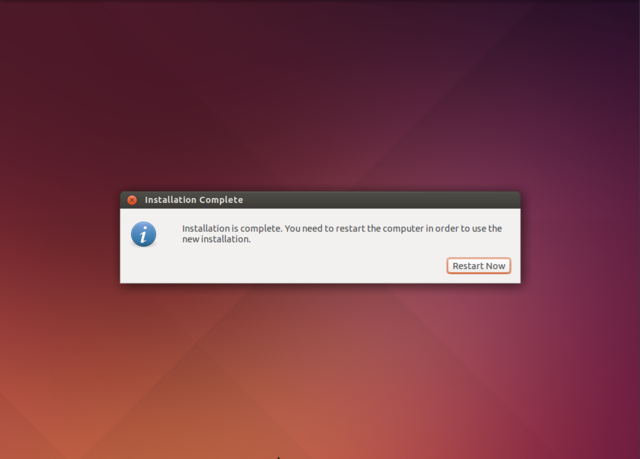
And yes!
Remove boot medium, and set BIOS to start from hard disk.After install
By default, Ubuntu sends some of your information to third parties without asking you to opt-in. Follow these 6 simple steps to fix Ubuntu and restore your privacy https://fixubuntu.com/
If you are not doing a stealth install, and if you have your network card working, to get the upgrades since the image you installed was made, on the command-line do:
$ sudo apt-get update
$ sudo apt-get dist-upgrade
Debian with MATE
In the Isolinux bootloader menu choose install:
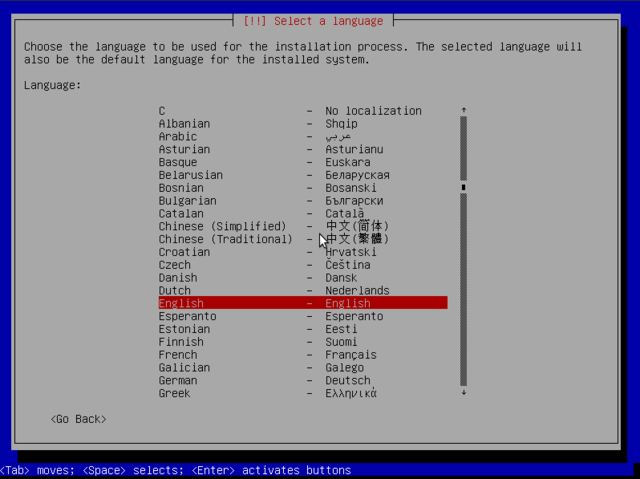
Choose language (this sets language for both the installation process as well as for the to-be-installed linux):
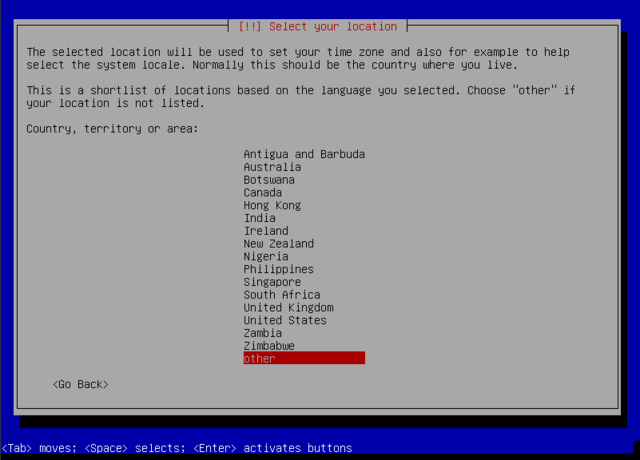
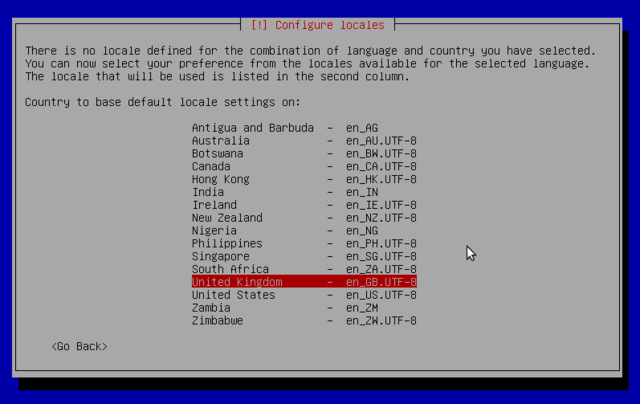
Select location. It doesn't have to be where you actually are. And you can change it later. It sets what repositories you use, but even that can be changed later.
Locales are used by glibc and other "locale-aware" programs or libraries for rendering text, correctly displaying regional monetary values, time and date formats, alphabetic idiosyncrasies, and other locale-specific standards:
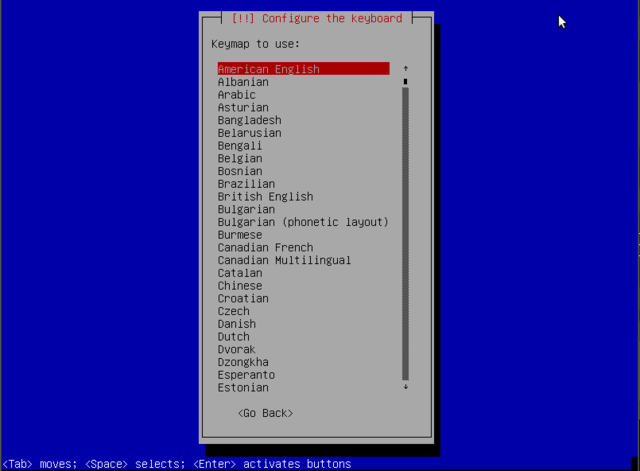
The "American English" keyboard corresponds to the QWERTY layout, otherwise pick yours:Until now the installation steps were completely contained in the boot image included on the CD/DVD, a file of limited size and loaded into memory by the BIOS when booting from the removable medium. What follows are a few automatic windows showing progress in:- detecting hardware: detects hardware and tries to identify the drive and loads the modules of the various hardware components detected, and then "mounts" the drive to read it
- loading additional components: loads all the files necessary to continue including additional drivers for remaining hardware (especially the network card), as well as all the components of the installation program
- detecting network hardware: tries to identify the network card and load the associated firmware. If automatic detection fails, you can manually select the firmware to load, and you can do it later. If need be you can use a USB-network-adapter. If doing a netinst installation, this must be made to work now, because the debian packages must be loaded from the network.
Next the installer attempts an automatic network configuration by DHCP (for IPv4) and by IPv6 network discovery. If this fails, the installer provides choices: you can try again, attempt DHCP configuration by declaring the name of the machine (rumpelstiltskin jumps to mind), or set up a static network configuration. This requires having an IP address, a subnet mask, an IP address for a potential gateway, a machine name, and a domain name to enter.
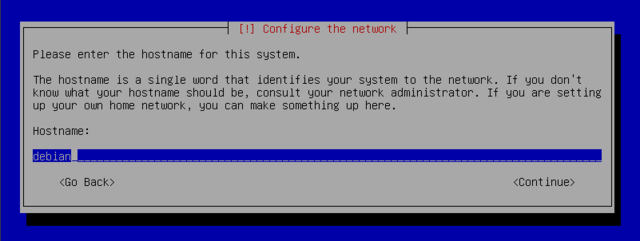
If network is successfully configured, pick whatever name for your host.
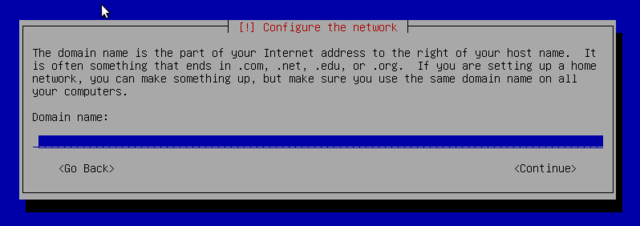
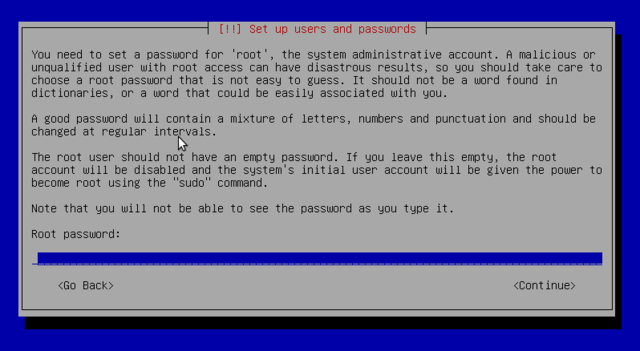
Leave domain name empty and continue.Make the root password long (8 characters or more) and hard to guess. All machines connected to the internet are regularly targeted by automated connection attempts with the most obvious passwords and sometimes even with dictionary attacks. Avoid using names of partners, pets, children, parents, friends, dates of birth, etc. Use password generators.
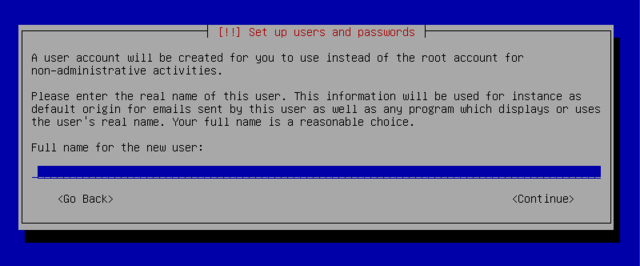
Debian also imposes the creation of a standard user account on you so that you do not get into the bad habit of working as root. The precautionary principle applies.
If the network is available, the system's internal clock is updated (in a one-shot way) from an NTP server. This way the timestamps on logs will be correct from the first boot.
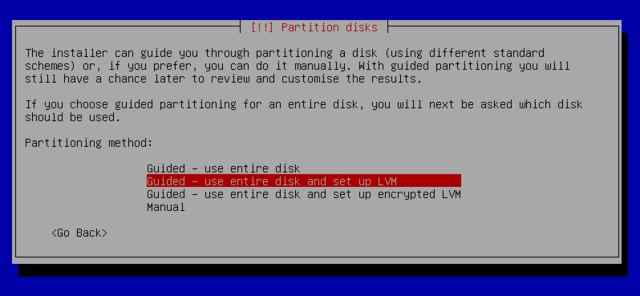
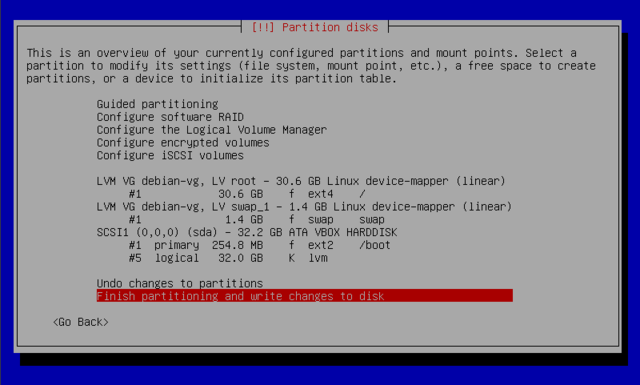
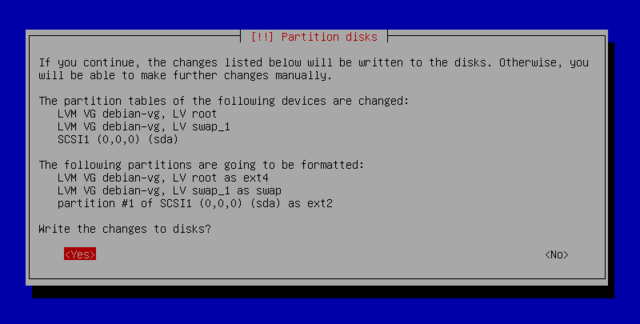
Partitioning is for dividing the available space on the hard drives. This step also includes choosing the filesystems to be used. All of these decisions will have an influence on performance, data security, and the administration of a server. For more on that, check out manual partitioning.
To install next to a windows system, check out dual boot before you continue.
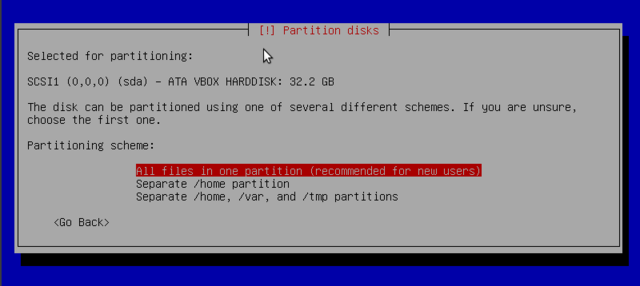
For a standard install of debian on a PC as new user, the very easy way is recommended:
The next steps do not require any user interaction. The "base system" packages, dpkg and apt for managing packages, and utilities to boot the system, are installed.
In order to be able to install additional software, apt needs to be configured and told where to find debian packages. You are asked if it must use a network source for packages, or if it should only look for packages on the removable media you are installing from.
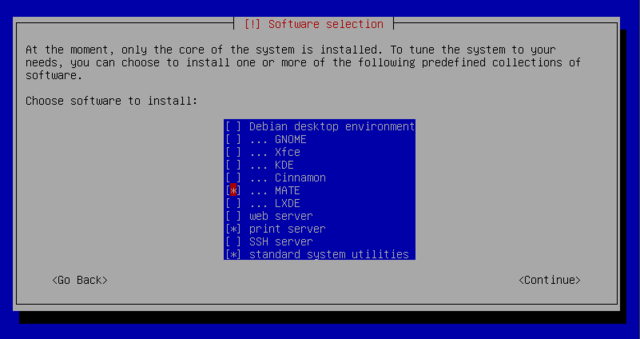
MATE:
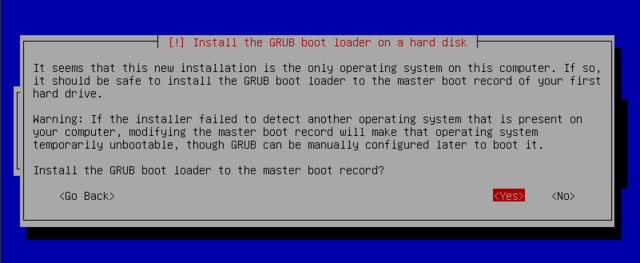
The bootloader is the first program started by the BIOS. This program loads the linux kernel into memory and then executes it. It often offers a menu that allows the user to choose the kernel to load and/or the operating system to boot.
If you are installing via USB, best not to automatically install GRUB, but to choose No and set it manually. That list of disks and device files when partitioning.
That's it. Reboot.
After install
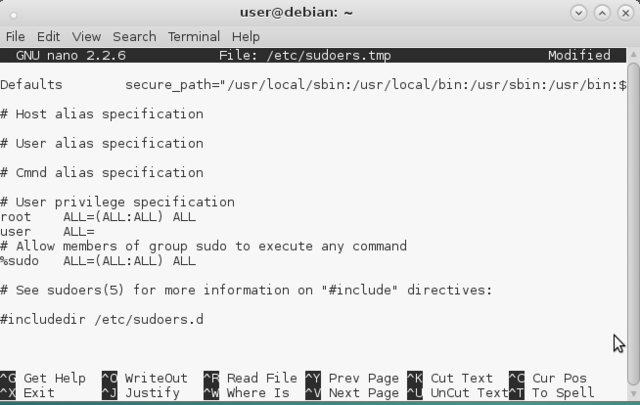
Add your user to the "sudoers" list (or else keep su-ing for actions that require administrator permissions). To add a user to the sudoers list you can use visudo (and need to su for that first).
Visudo is opened. Scroll down to this line "root ALL=(ALL:ALL) ALL" and add a line directly below for the user. On a PC you can just copy the entire line (it is still somewhat empty here) for root and change "root" to user. On a server you do not give users ALL permissions. Ya read this http://ubuntuforums.org/showthread.php?t=1132821 and start some happy puzzling.
After you are done, you are returned to the command-line and can sudo.
If you are not doing a stealth install, and if you have your network card working, to get the upgrades since the image you installed was made, on the command-line do:
$ sudo apt-get update
$ sudo apt-get upgrade
Dual boot with windows
A windows OS should be installed first, because its bootloader is very particular and the installer tends to overwrite the entire hard drive, wiping out any data stored on it. If windows isn't already installed, install it first. If you are able to partition the drive prior to installing windows, leave space for linux during the initial partitioning process. Then you won't have to resize your NTFS partition to make room for your linux later, saving a bit of time.
if you install (or reinstall) windows after linux, the bootloader will be erased. Linux will still be on the hard drive, but will no longer be accessible from the boot menu as the windows bootloader does not recognise other operating systems. If this happens, you can restore the bootloader with the steps in F*&^% bootloader and rescue mode.
If you wish to keep using the windows bootloader you can try this:
- Turn off Windows Fast Boot http://www.eightforums.com/tutorials/6320-fast-startup-turn-off-windows-8-a.html
- Shrink the main Windows 8.1 partition. Windows expects a certain partition scheme https://technet.microsoft.com/en-us/library/hh824839.aspx so this can be a bit tricky http://forum.linuxbsdos.com/topic/151/how-to-resize-or-shrink-a-gpt-partitioned-c-drive-in-windows-8 Give Debian between 10G and 100 GB of space.
- Shut off Secure Boot and Fast Boot in the UEFI.
- Download your debian iso and put it on some media as described above.
- Insert your install media and install debian in the space you created. At the partitioning step make notes on what partitions are labeled what (/dev/sdx).
- At the end of installing debian, you can set the installer to install GRUB in the EFI System Partition of Windows 8.1.
Alternatively turn UEFI off (use Legacy) and set the installer to put the GRUB bootloader (that will have an entry for windows) on a linux partition.
Manual partitioning
Manual partitioning allows for choosing the purpose and size of each partition. You need this if you wish to use software RAID or install linux alongside an existing operating system (windows or other).
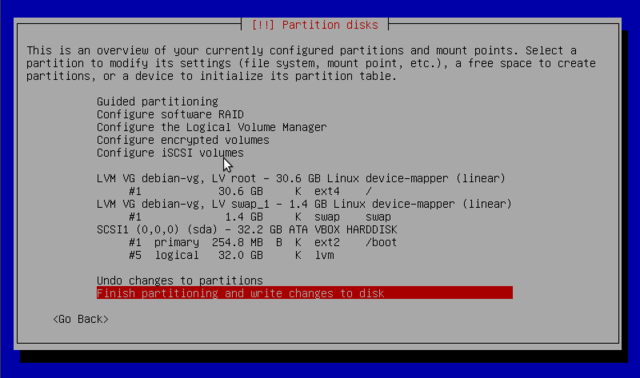
The first screen of manual partitioning displays available disks, partitions, and any possible free space that has not yet been partitioned. You can select an item and pressing the Enter key gives a list of possible actions. You can erase a partitions on a disk by selecting it. When selecting free space on a disk, you can manually create a new partition. You can also do this with guided partitioning.
The so-called mount point is the directory tree that will house the contents of the file system on the selected partition. A partition mounted at the directory /home/ is meant to contain user data. The directory / is the root of the file tree, and therefore the root of the partition that will host the debian system.
Virtual memory allows the kernel to free a bit of storage by storing the parts of the RAM that have been inactive for some time on the swap partition of a hard disk. To simulate the additional memory, windows uses a swap file that is directly contained in a file system. Linux uses a partition, hence the term "swap" partition, mounted at /swap/.
When choosing a partition, you can:
- format it and include it in the file tree by choosing a mount point
- use it as a swap partition
- make it into a "physical volume for encryption"
- make it a "physical volume for LVM"
- use it as a RAID device
- leave it unchanged
Recommendations
- Use LVM
- Depending on your threat model, configure encrypted volumes.
- If you plan to install many programs not part of the your distribution create a separate
/usr/localpartition. - You can put
/tmpon its own partition with 20–100 MB. - For multi-user systems or systems with lots of disk space you can put
/usr,/var,/tmp, and/homeeach on their own partitions separate from the/partition. For very complex server systems see the Multi Disk HOWTO http://www.tldp.org/HOWTO/Multi-Disk-HOWTO.html - If you are setting up a server with lots of user accounts, create a separate large
/homepartition. - If your machine will be a mail server, you can make
/var/maila separate partition.
Configure the Logical Volume Manager
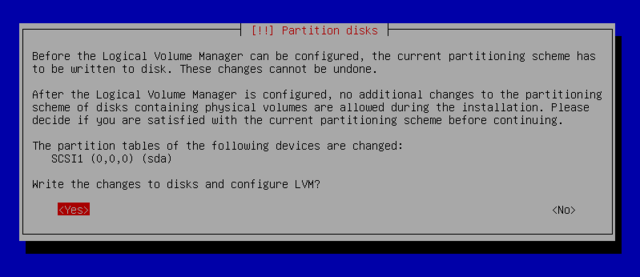
You want this. The size of the partitions are no longer limited by individual disks but by their cumulative volume, and you can resize existing partitions at any time, possibly after adding an additional disk. The partitioning tool can do this automatically or you can configure LVM yourself:
- Create the partitions that will be "physical volumes for LVM".
- To activate LVM, choose "Configure the Logical Volume Manager (LVM)", then on the same configuration screen "Create a volume group"”, to which you associate the existing physical volumes.
- Create logical volumes within this volume group.
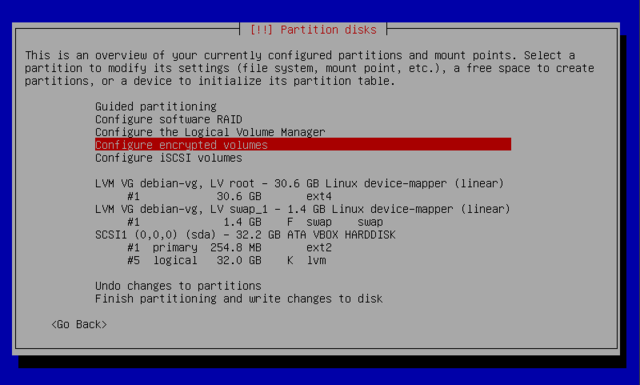
Configure encrypted volumes
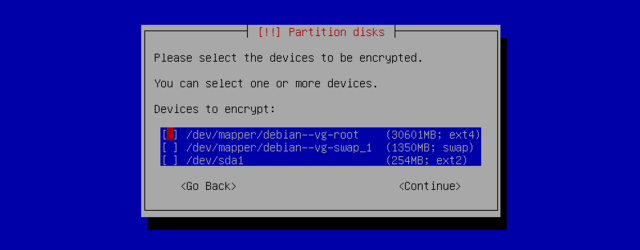
For confidentiality of your data you can encrypt the data on some partitions. This feature can be added underneath any filesystem, because linux (dm-crypt driver) uses the Device Mapper to create a virtual partition (with protected content) based on an underlying partition that will store the data in an encrypted form. For more on that see LUKS, the Linux Unified Key Setup, a standard format enabling storage of encrypted data and meta-data on the encryption algorithms used.
When an encrypted partition is used, the encryption key is stored in memory (RAM). Retrieving it allows the decryption of the data, making it important to not leave a copy of this key anywhere that a thief of the computer or hard drive can access. On laptops the contents of RAM is stored on the swap partition during hibernation. When using encrypted partitions, also encrypt the swap partition.The software will then propose to initialise the physical volume with random data (making the localisation of real data more difficult), and will ask you for an "encryption passphrase" (make it hard but not too hard because you will have to enter it every time you boot your computer or access the content of the encrypted partition.This partition can be used as a physical volume for LVM so as to protect several partitions (LVM logical volumes) with the same encryption key, including the swap partition.
F*&^% bootloader and rescue mode
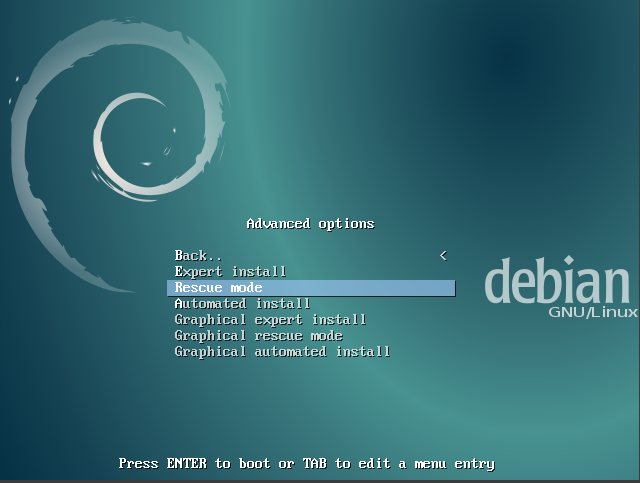
Sometimes, things go wrong, and the system you've carefully installed is no longer bootable. Perhaps the boot loader configuration broke while trying out a change, or right after installation of debian the system does not boot, etc. Whatever happened, boot from your installation medium in rescue mode:
You'll be shown the first few screens of the installer, with a note in the corner of the display to indicate that this is rescue mode, not a full installation. Your system is not about to be overwritten. Rescue mode simply takes advantage of the hardware detection facilities available in the installer to ensure that your disks, network devices, and so on are available to you while repairing your system.
Then, instead of the partitioning tool, you are shown of the partitions on your system, and are asked to select one of them. You can choose partitions on RAID, LVM devices or partitions directly on disk containing the root file system.
The installer will now give you a shell prompt for doing repairs in the file system you selected. If the installer cannot run a shell in its root file system, the file system may be corrupt or one or many of many other things may have happened. Repairing broken systems can be difficult, and if you have problems, consult another geek, or hit the forums and mailing-lists.
For reinstalling the GRUB boot loader into the master boot record of the first hard disk, do:
# grub-install '(hd0)'
After you exit the shell, the system will reboot. Or not. In which case, hit the mailinglist, IRC channel or forums, or all of them if need be with this excellency challenging question.
Upgrading distributions
Recommendations for upgrading
- If you are new to linux, use the Software Center.
- Use apt-get for big upgrades, for example a dist-upgrade from one stable to the next, because it will find relatively good solutions quickly, while aptitude will likely find several convoluted solutions (or none at all).
- For regular upgrades in unstable or testing versions of a debian-based distribution, use aptitude: aptitude safe-upgrade can keep temporarily broken packages on hold while still installing new packages and you can tweak operations dynamically.
Getting a device to work
Hardware like a sound card or ethernet card, etc. have two essential pieces of software that make them function. The first is a working driver, software that lets your system talk to the hardware. The second is firmware, usually a small piece of code uploaded directly to the device and maintained by the company that develops the hardware device. You can think of the firmware as a way of programming the hardware inside the device. It is a black box, and because of that treated like hardware; there’s no accompanying source code that is freely distributed with it.
Firmware can come from one of the following sources:
- The linux-image package (containing the linux kernel and licensed firmware, installed by default)
- The linux-firmware package (containing other licensed firmware, installed by default)
- The linux-firmware-nonfree package in multiverse (containing firmware that are missing redistribution licenses, not installed by default)
- A separate driver package (not installed by default)
- Elsewhere (not installed by default, driver CD, email attachment, website)
If during install you get messages as to hardware that could not be provided for, write down what those messages say. It probably looks something like
e100: eth0: e100_request_firmware: Failed to load firmware "e100/d101m_ucode.bin": -2
When you installed the kernel, the post-installation script went through all loaded modules (listed by 'lsmod') and verified whether modules as provided by the newly installed kernel might require firmware files. This information can be retrieved with modinfo, which needs a path to the modules. You either traverse there, or build the path to the modules using:
$ uname -a
Linux debian 3.16.0-4-amd64 #1 SMP Debian 3.16.7-ckt11-1 (2015-05-24) x86_64 GNU/Linux
Then with modinfo:
$ modinfo -F firmware /lib/modules/3.16.0-4-amd64/kernel/drivers/net/e100.ko
e100/d102e_ucode.bin
e100/d101s_ucode.bin
e100/d101m_ucode.bin
The firmware packages embed the list of firmware files in their description, so now you can use
$ apt-cache search d101m_ucode.bin
firmware-linux-nonfree - Binary firmware for various drivers in the Linux kernel
You can also use 'apt-file' (provided by the package of the same name) or the web interface at packages.debian.org.
$ apt-file search d101m_ucode.bin
firmware-linux-nonfree: /lib/firmware/e100/d101m_ucode.bin
If the above commands return nothing, you probably need to enable the "non-free" repository in your /etc/apt/sources.list first. You can also enable it within synaptic. And you also want to run 'sudo apt-file update' to have the latest information.
Now you can install the right package, in the example above it was firmware-linux-nonfree.
Installing debian like an expert
At the first screen running the installer choose "Advanced Options" and then "expert install". This makes the installation process "verbose" and details all possible options in the process of installation, and allows for navigation between the various steps without them happening automatically in sequence.
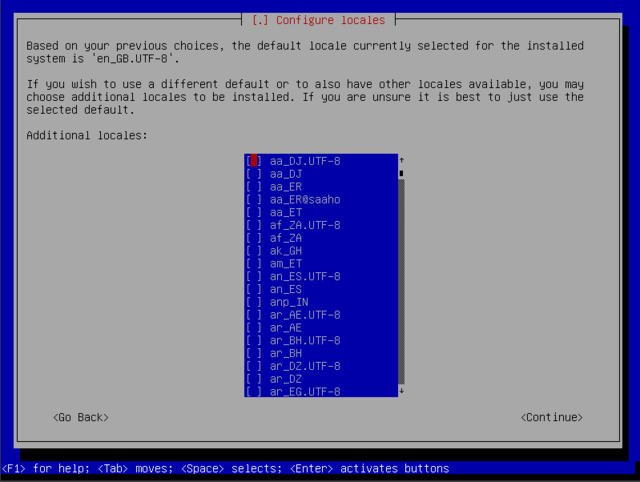
Select multiple locales
The "select locales" choice allows for entering multiple locales:
For some often-used locales see https://wiki.debian.org/Locale
Detect and mount CDROM
First it finds removable drives other than CDROM:
Next it detects CDROM:
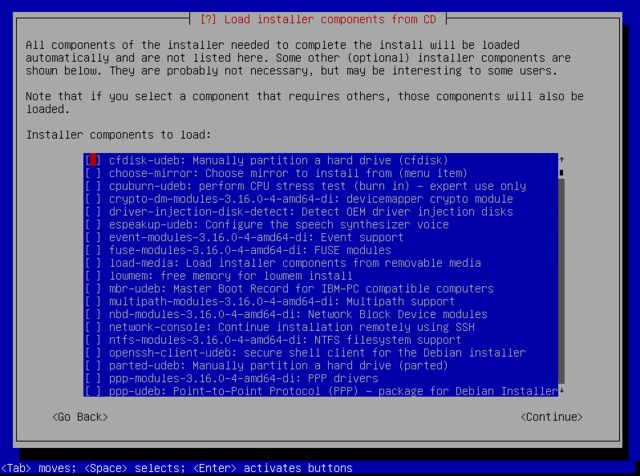
Load installer components from CD
These are additional components that you can use during install:
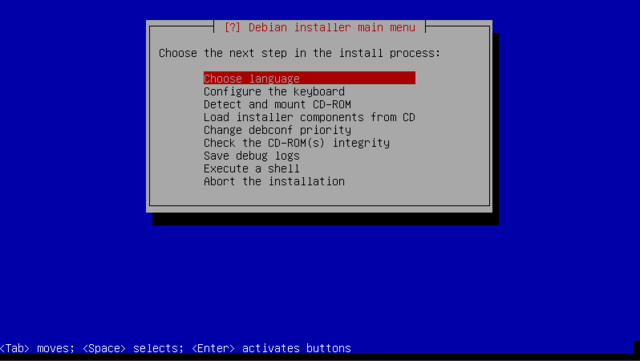
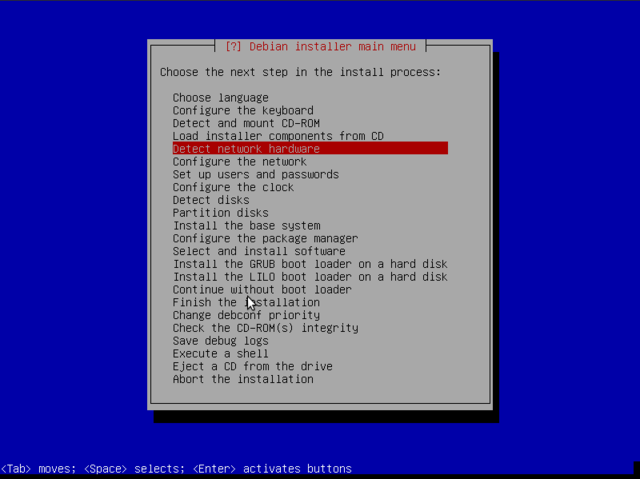
Now the main menu contains more items to hopscotch through:
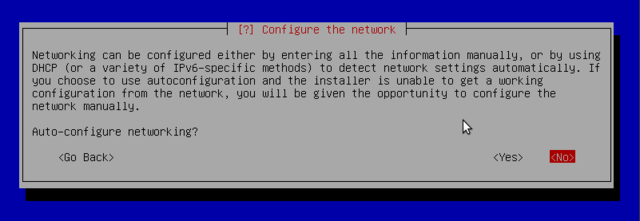
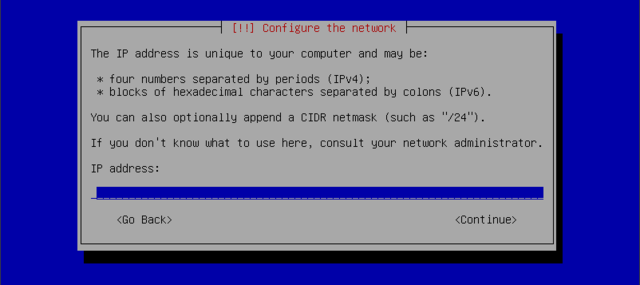
Configure network
... and forward. This requires filling in an IP address, a subnet mask, an IP address for a potential gateway, a machine name, and a domain name to enter.
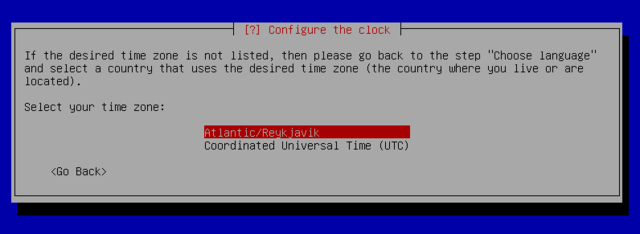
Configure the clock
NTP (Network Time Protocol) allows a machine to synchronize with others fairly accurately, taking into consideration the delays induced by the transfer of information over the network and other possible offsets. There are numerous NTP servers on the Internet, and the more popular ones may be overloaded. The pool.ntp.org NTP server is a group of machines that have agreed to serve as public NTP servers. You can limit use to a sub-group specific to a country, with, for example, us.pool.ntp.org for the united states, or ca.pool.ntp.org for canada, or:
Partition disks
This is the same as during a standard install. You can use guided partitioning (see standard install above) or manual partitioning.
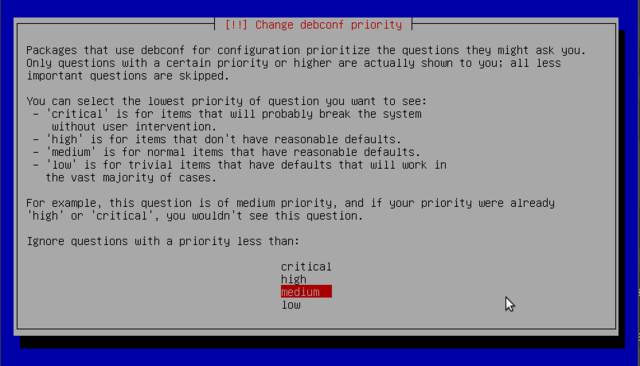
Change debconf priority
When installing (or upgrading) any single package or a group of packages, debconf asks the packages' configuration questions all at once, and stores the user/admin preferences in a database. Later as the packages are installing, their scripts use the configuration preferences in the database to generate configuration files and otherwise do administrative tasks (e.g. set up servers to start or not start, install other software such as libdvdcss, etc.). This saves the hassle of editing configuration files by hand, and also of waiting for each individual package to install before responding to certain configuration questions. Important during a server install.
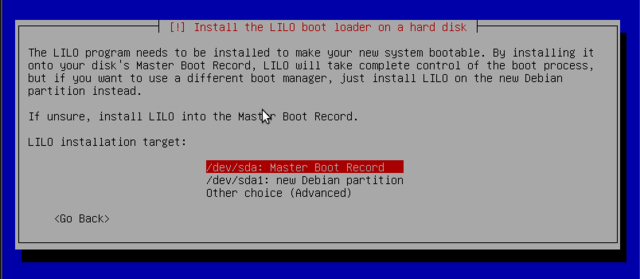
Install the LILO boot loader on a hard disk
GRUB is the default bootloader installed by debian: it works with most filesystems and reads its configuration during boot to find the exact position of the new kernel. That means it doesn't require an update after each installation of a new kernel. Version 1 couldn't handle all combinations of LVM and software RAID and version 2 is more complete, but there may still be situations where LILO can save the day.
If you want to see some of the above expert options applied, see this tutorial from 2011: How to install and multi-boot between Windows, and Debian Testing with full disk encryption http://scarygliders.net/2011/12/06/how-to-install-and-multi-boot-between-windows-and-debian-testing-with-full-disk-encryption/Stealth install
- Download and burn the CD/DVD's via a public machine.
- Official CD images do not include non-free firmware. Download the unofficial CD builds containing non-free firmware from http://cdimage.debian.org/cdimage/unofficial/non-free/cd-including-firmware/. If using a USB stick, download from http://cdimage.debian.org/cdimage/unofficial/non-free/firmware/ and unpack to either the root directory or a directory named
/firmwareof the file system on the medium. If the firmware you need is not included in the tarball, you can also download specific firmware packages from the (non-free section of the) archive http://packages.debian.org/search?keywords=firmware. It is also possible to copy individual firmware files to the medium. Loose firmware could be obtained for example from an already installed system or from a hardware vendor. - For installing packages, see Stealth install of applications
Related
- Linux applications
- Linux security
- Kinky linux command-line
- Anonymising your traffic with linux
- Clean up all the things
- Shell scripting
- Encrypting everything
- Linux virtualisation
- Making our own linux images
References
- ↑ Facts and Fallacies of Software Engineering (2003) http://books.google.com/books?id=3Ntz-UJzZN0C&pg=PA174#v=onepage&f=false
- ↑ When Free Software Isn't Better http://mako.cc/writing/hill-when_free_software_isnt_better.html
- ↑ Don't believe these four myths about linux security https://blogs.sophos.com/2015/03/26/dont-believe-these-four-myths-about-linux-security/
- ↑ Don't panic and keep forking Debian™! :^) https://devuan.org/newsletter_22dec.html
- ↑ Phoronix Test Suite http://phoronix-test-suite.com/
- ↑ Phoronix: Operating Systems http://www.phoronix.com/scan.php?page=category&item=Operating%20Systems


